Seven months. Three major revisions. An unwavering drive to succeed.
Read the previous article HERE
Complete Teardown & Rebuild
For the last two builds of Resilience, I had used the exact same frame. A 21 year old Diamondback frame that I retrofitted with an engine and fuel tank. This time, I wanted to take my build to the next level – I bought a frame specifically designed for motorized bikes.
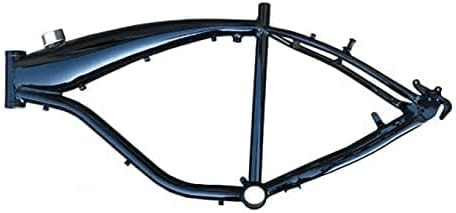
In order to transition to this new frame, I tore down Resilience’s old frame and began to assemble her on this new frame of mine. I attached my old wheels, seat, and front fork to the frame and was left with a good representation of what the frame was going to look like on the bike.

Mag Wheels?
One major issue I ran into while working on my second version of Resilience was the rear wheel slowly migrating out of true. This was due to the sheer amount of horsepower I was putting straight through the spokes, which would lead to bending and snapping of spokes, and subsequently sending the wheel out of true.

I was able to pick up ten-spoke mag wheels off of BikeBerry’s website during their Black Friday sale for about $100. These wheels were all one piece, and would never migrate out of true. Furthermore, these wheels came with disc brakes and a pre-installed motorized bike sprocket! This helped me solve my drivetrain issues and make Resilience’s drivetrain so much more reliable.
I had never installed disc brakes before, so in all honesty I probably installed them wrong. Either way, they work!
Engine Mounting
Mounting the engine to Resilience’s new frame was a breeze. This frame was specially designed to fit an engine in the V-slot, so I had more than enough clearance to mount the engine.

I decided to rubber-mount the engine to the frame, hopefully to dampen vibrations and prevent the nuts from rattling loose when revving high.
Electronics!

For this build of Resilience, I wanted to add more electronics to the build and make her safer at the same time. The first order of business was to add a headlight. However, I didn’t want some cheap, crappy battery operated headlight. I bought a cheap headlight on Amazon and modified it to be able to take 3.3-5VDC through two wires emerging out the top of it. I connected the headlight to an AC/DC converter that would be hooked up to the magneto.

That might sound complicated, but it’s honestly really simple. I just connected the magneto to both the CDI and the AC/DC converter with a switch, so I can toggle the AC/DC converter on & off at will.
A completed build.

This is what Resilience looks like now. I’m not sure how much longer I’m gonna be working on her, as it’s getting VERY cold out and I don’t like riding in the cold. From here, I’ll probably be working much more on HORIZON II and getting the avionics for HORIZON working great. Honestly, I just work on whatever I feel like (my last post on Resilience was supposed to be the last, but I got carried away!). I guess we’ll see where my projects take me next =)


